I bake bread for my family every week. Home baking is not that hard, not that time consuming, and certainly cheap! You don't need a bread machine or a lot of fancy equipment. This blog features a tutorial on home bread baking, tips on equipment and ingredients, and recipes for real home cooking.
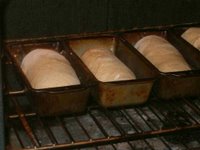
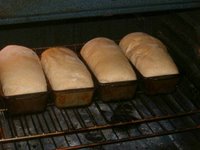
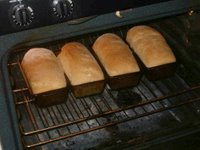
The last steps of baking bread are to shape the loaves, let them rise a final time, bake, and eat.
When the dough has risen in the bowl about 45 minutes it will look like the classic description “doubled in bulk”. That 45 minute figure is a flexible, of course, but if you let it rise too long, the yeast will exhaust itself and your loaves won’t rise so well. In a hurry, I have started shaping loaves as soon as there was an observable rise and that works out OK, too.
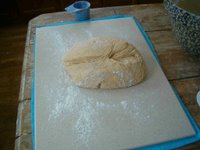 Take the whole pile of dough and lay it out on a floured bowl. Flour your rolling pin and then roll the dough out flat, being sure to pop the air bubbles that turn up at the edges.
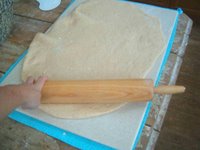
You don’t need to roll it paper thin, but you need to eliminate those big bubbles because they will end up as voids in the finished loaves.
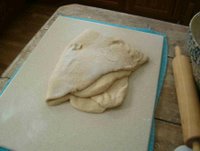
After the bubbles are gone, fold the whole thing in half, fold it in half again, then one more time into a wedge shape.
Roll the dough up starting at the point, and then let it rest while you grease your pans.
This recipe fills four 5 by 8 inch bread pans or you can use three 5 by 8 and two 3 by 5 inch pans. Cut the lump of dough into fourths and then cut one of the fourths into two hunks of dough for the kiddy pans. If you are baking with kids, let them grease their pans and then let them take turns rolling out their dough and putting it in their pans. Kids will do what they do and be happy with the results; adults will want to take a more methodical approach.

Roll out one piece of dough at a time into an irregular rectangle, still looking to get rid of bubbles.
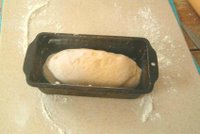 Roll the rectangle up tightly from the narrow end, and then fold the ends of the roll under so that the cylinder you have left is the same length as the pan. Lay the loaf into the pan with the seams down. Shape your other loaves the same way.
Next: Last Rise and Baking
When the dough has risen in the bowl about 45 minutes it will look like the classic description “doubled in bulk”. That 45 minute figure is a flexible, of course, but if you let it rise too long, the yeast will exhaust itself and your loaves won’t rise so well. In a hurry, I have started shaping loaves as soon as there was an observable rise and that works out OK, too.
 Take the whole pile of dough and lay it out on a floured bowl. Flour your rolling pin and then roll the dough out flat, being sure to pop the air bubbles that turn up at the edges.
You don’t need to roll it paper thin, but you need to eliminate those big bubbles because they will end up as voids in the finished loaves.

After the bubbles are gone, fold the whole thing in half, fold it in half again, then one more time into a wedge shape.
Roll the dough up starting at the point, and then let it rest while you grease your pans.
This recipe fills four 5 by 8 inch bread pans or you can use three 5 by 8 and two 3 by 5 inch pans. Cut the lump of dough into fourths and then cut one of the fourths into two hunks of dough for the kiddy pans. If you are baking with kids, let them grease their pans and then let them take turns rolling out their dough and putting it in their pans. Kids will do what they do and be happy with the results; adults will want to take a more methodical approach.

Roll out one piece of dough at a time into an irregular rectangle, still looking to get rid of bubbles.
 Roll the rectangle up tightly from the narrow end, and then fold the ends of the roll under so that the cylinder you have left is the same length as the pan. Lay the loaf into the pan with the seams down. Shape your other loaves the same way.
Next: Last Rise and Baking
Last posts
Archives
ATOM 0.3
Looking for more?
There's more to food than just nutrition, otherwise we would all be eating custom-formulated kibble. I didn't exactly learn to bake from my grandmother, but my ancestors, even the ones I never met, have informed and influenced my lifelong exploration of cooking and food. Want to read more? Check out this entry from my home blog, French Road Connections
