For most people, the most mysterious part of baking bread is kneading. Somehow, you must use your hands to transform a sticky or stiff pile of batter into a smooth ball of dough. It is easy, until you get the hang of it, to find yourself either up to your elbows in sticky dough or arm wrestling with a stiff dough that is destined to rise no higher than a doorstep.
You can probably figure out that the cause of the first condition is too much liquid and the cause of the second condition is too much flour. So why don't recipes just tell you exactly how much flour to use? Because they can't. If your flour is older, it will absorb more liquid. If the weather is humid, it will absorb less. How you store your flour, whether you shake the cup as you measure, even the variety of wheat your flour was ground from, it all makes the process too unpredictable. Although it is initially hard to master, the skill of turning a wet batter into kneadable dough is one that you never lose.
We have already seen several tricks of the trade:
---The glob of shortening that we added to the batter will help make the bread fine grained and tender, but it will also make the dough less likely to stick to your hands. As you get more experienced, you can cut down the fat in the recipe.
---Use bread flour for at least some of the flour. A cup of semolina flour (also called pasta flour) used as part of the 3 cups of flour in the batter will help make the dough kneadable.
---Take your time while adding flour to give it time to absorb the liquid. If you have small children around you have guaranteed interruptions. If not, take a break to put laundry in the dryer or check your email.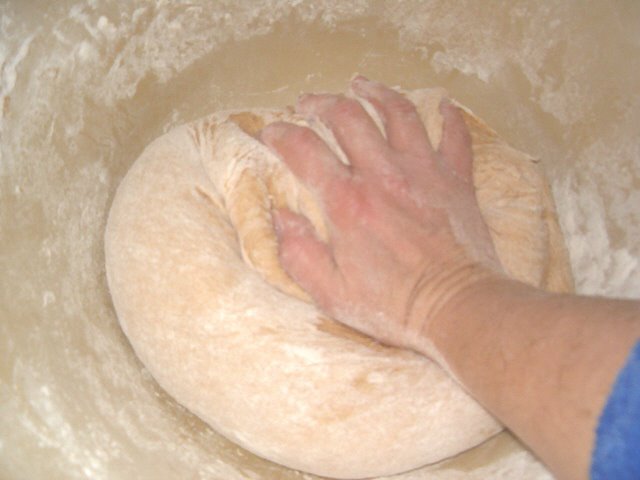
I usually use about 4-5 cups total whole wheat flour and then switch to white flour. The white flour absorbs less liquid so I am less apt to use too much. Stirring thoroughly after each cup of flour, I find that as the dough gets stiffer I am stirring less and folding more. With a strong wooden spoon I can turn the dough in the bowl and fold it over on itself, sort of like kneading without getting my hands into it yet. Already there are drier looking bits of dough on the sides of the bowl; I scrape these down and into the wetter center of the dough. Eventually I am just turning the dough over on itself and only occasionally adding flour. This is a good time to take one more short break and let the dough get used to itself again.
When I come back to the dough after 5 or 10 minutes it is ready for hands-on kneading. Whether I knead on the table or in the bowl, the action is the same: flatten the dough with the heels of my hands, then fold it over on itself, turn it a little, then flatten, fold and turn again. At first I need to keep putting flour on my hand to keep the dough from sticking, later it gets to be moist, not sticky so my bare hands are fine.
It is impossible to hand knead standard bread dough too long. I usually look at the clock once the dough stops sticking and then try to keep up a good rhythm for 5 or ten minutes. Time spent kneading is very much like time spent in deep thinking. You stretch thoughts and fold them over on themselves until myriad elements take on a new identity of their own. If I am pressed for time I will knead for less time, but I know I'm gambling. Kneading develops the gluten that will make the loaves rise with strength; insufficient kneading makes loaves that tend to fall if you sneeze at them.
After kneading it is time to let the dough rise. If I am kneading on the table, I just invert the bowl over the dough and leave it alone. If I am kneading in the bowl, I leave it in the bowl, but cover the bowl with my Corian board or a cookie sheet to keep the dough from drying out.
Next: Shaping Loaves
The number of eggs is quite variable. I often use no eggs. Sometimes I cut back to 2 cups of water and use as much as six eggs. This makes a dough that is like bagel dough or sweet bread dough if you add a little more sugar.
I use a long handled wooden spoon for mixing and for measuring the shortening, which doesn’t need to be measured precisely. A ¼ cup size dollop from the mixing spoon is fine.
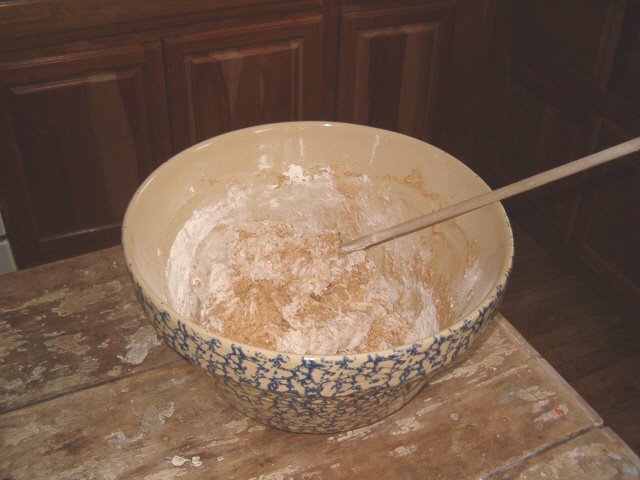
The directive to “200 times without reversing direction. Let sit 20 minutes.” might be the most mysterious part of the recipe. During this time the flour is absorbing water and forming long strands of protein called gluten. Later we will want this gluten since it will stretch and contain the bubbles of carbon dioxide produced by the yeast. More bubbles mean lighter bread. Stirring back and forth would break up the strands of yeast. (At least that is what I was taught but as I write these words they look like a theory begging to be proved or disproved.)
Letting the dough sit for 20 minutes gives the flour time to thoroughly absorb the liquid and makes it harder to add too much flour in the final phase of the recipe. This is easily observed; after the rest the batter looks thicker and gloppier.
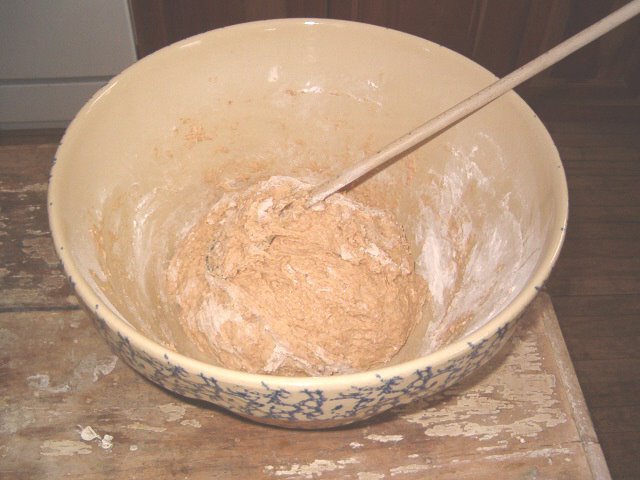
After letting the dough rest, you continue to add flour, sprinkling it on a little at a time and mixing. It soon starts to look less like a blob and more like a ball; this is your cue to switch from a mixing motion to kneading.
When my kids were little they loved to help with making bread. I let them measure the ingredients and help me count to 200 as we stirred. When I put the dough up to rest before kneading I would often wait quite a long time to add the rest of the flour and then knead the dough, as the kids were only in the way during the kneading process. I would “sneak” a little kneading here and there while they were diverted with other things, but the bread didn’t suffer. They were invited back after the dough rose and they would happily shape dough into two half-size loaf pans.
Next: Kneading
There is a danger here of making things sound unnecessarily complicated. You don't have to go out and buy a whole new kitchen to bake a loaf of bread, but when you are going to be doing a job over and over again for years to come, you might want to work towards collecting the sort of equipment that makes the job less frustrating and more rewarding.
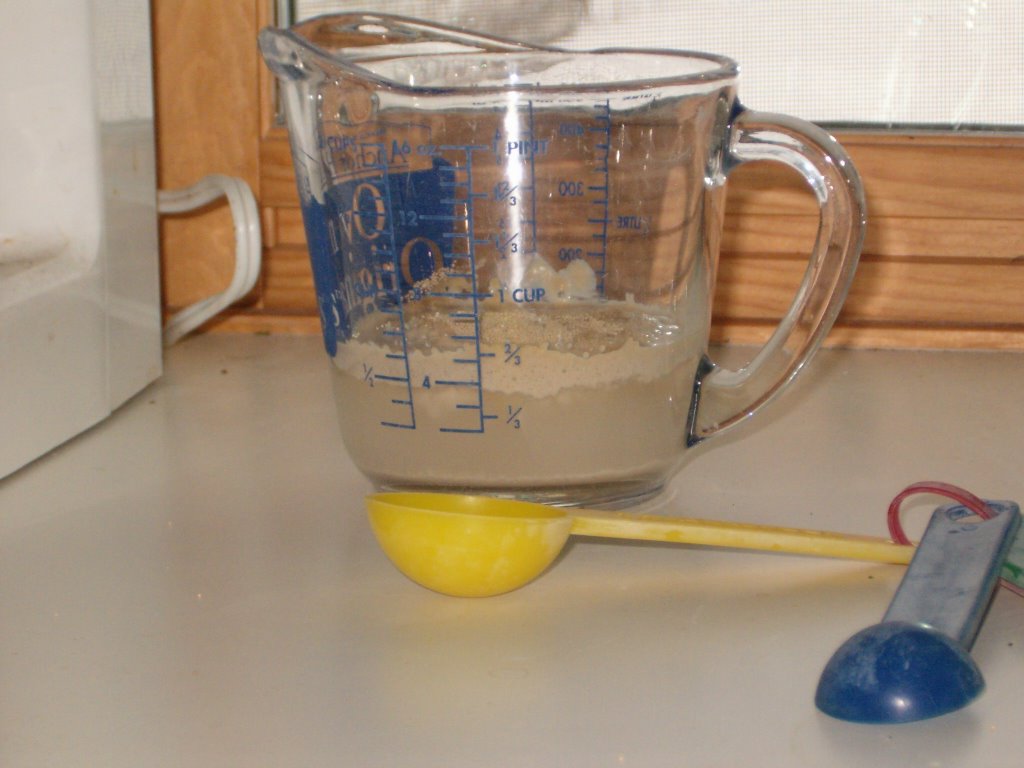
A word about time. Yes, it takes time to make bread, but mixing and kneading and rising can be done in small chunks interspersed with other chores, like laundry or caring for small kids. In fact the bread turns out better when you are not worrying it or rushing it along. You will also find that the yeast has something of its own schedule. On hot days your dough will rise fast, but on cooler days you can choose to be more leisurely. This is my first favorite piece of equipment: a 2 cup clear Pyrex measuring cup. I sprinkle the 2 tablespoons of yeast on top of the ½ cup warm water and wait for the yeast to dissolve.
Old time recipes call for "proving" yeast like this every time you bake. Modern recipes skip this step, but I find it useful as I still on rare occasions find that my yeast is not as robust as I would like.

My mixing bowl is large, about 14 inch in diameter, and heavy enough that I can knead the dough right in in. It is stoneware so it holds heat or cold; on these cold winter days I fill it with warm water in the sink to warm it before I start baking. I actually chose my kitchen sink with this bowl in mind -- I wanted to be able to wash my bread bowl easily.
While I love my bread bowl, it was expensive. I have also made this recipe in the 32 cup Tupperware bowl and found the lid to be handy for covering the dough while it rose.
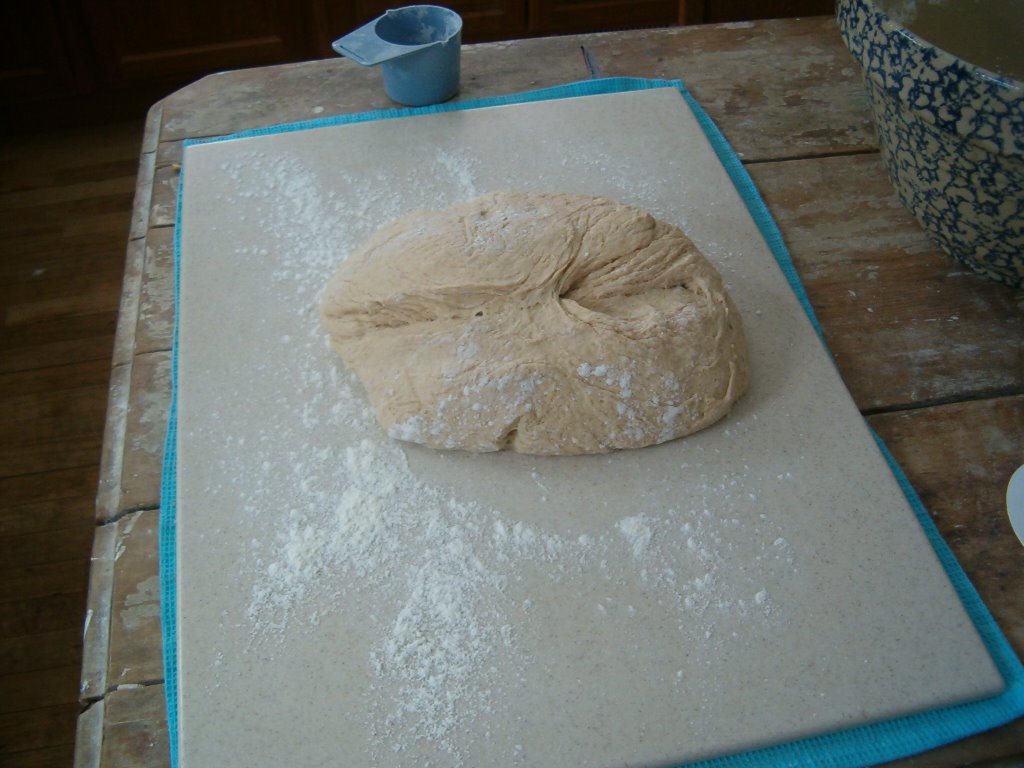 My final essential piece of equipment could be called "someplace to knead". I am 5'4"; I find that the kitchen counter is just too high comfortable kneading. My kitchen table is the right height, but it is ridiculously rustic. My husband cut and sanded a 17" by 24" piece of Corian that I can lay down on top of a dish towel. This serves for kneading, but also for rolling out all kinds of dough. The dish towel keeps it from sliding all over. If I had a Formica table top, I would use it for kneading.
I either do the first rise in the bowl with the board covering the bowl, or on the board with the bowl covering the dough. Many bread recipes tell you to "cover the dough with a damp cloth", I have always found that the dough sticks to the cloth and makes a big mess. Next: Mixing Bread
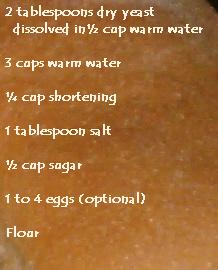
My standard flour is a combination of whole wheat bread flour and white flour. I use 3 or 4 cups of whole wheat to start the recipe and white flour to finish. (My usual plot is to use as much whole grain flour as my family will eat without thinking that I am serving them "health food".)2 tablespoons dry yeast dissolved in ½ cup warm water
3 cups warm water
¼ cup shortening
1 tablespoon salt
½ cup sugar
1 to 4 eggs (optional)
Flour
Dissolve yeast in water.
Combine yeast, water, sugar, salt, shortening, and eggs. Add 3 cups of flour, then stir 200 times without reversing direction. Let sit 20 minutes.
Add flour one cup at a time until dough kneadable. Do this slowly; the flour needs time to absorb water and if you add too much flour too fast your bread will be dry. Knead the bread for 10 minutes, and then let it rise for an hour.
Shape the dough into four loaves and let rise until they are large.
Bake at 350 degrees for 35 minutes. Test one loaf with a probe-type thermometer; done is 190 degrees in the middle of a loaf that was in the middle of the oven. Turn out of the pans to cool.
Substituting one cup of semolina flour in the beginning makes the dough easier to knead. Stone-Ground Whole Wheat Bread Flour from Great River Milling is a nice choice. Semolina flour can be found at Bob's Red Mill.
Using the same recipe every week means that bread baking is routine and relaxing. I don't need to make big decisions or keep referring back to the cookbook. Since yeast, and therefore bread dough, is a live organism, it is helpful to be dealing with the same animal every time.
NEXT: Bread Baking Equipment
About me
- I'm Susan Och
- From Lake Leelanau, Michigan
Last posts
Archives

ATOM 0.3
Looking for more?
There's more to food than just nutrition, otherwise we would all be eating custom-formulated kibble. I didn't exactly learn to bake from my grandmother, but my ancestors, even the ones I never met, have informed and influenced my lifelong exploration of cooking and food. Want to read more? Check out this entry from my home blog, French Road Connections